lørdag den 28. september 2013

VICHY Liftactiv Serum 10 Eyes & Lashes Review (Danish & English)

Hi everybody! 

This blogpost will be in my native language danish, and in english for my english readers. I will write it in danish, since the product I will review was sent to my by the danish Vichy-facebook site. I was lucky enough to win a competition ("be the 1000 to join"-comptetition) and recieved their new product: Liftactiv Serum 10 Eyes & Lashes samples in the mail about a week ago. So I'm super excited to try it! 

Det her blog-indlæg bliver både på dansk, og på engelsk for mine engelske læsere. Det bliver på dansk fordi jeg blev tilsendt produktet fra den danske Vichy-facebook side. Jeg var heldig nok til at vinde en konkurrence fra Vichy ("vær en af de første 1000"-konkurrence) og modtog deres nye product: Liftactiv Serum 10 Eyes & Lashes tester i posten for omkring en uge siden. Så nu er jeg super spændt på at prøve det! 

¨


I've got to be honest, I never tried any product from Vichy before, but I've known their brand for quite some time. It seems to be a simple brand, and I really like that. Clean and simple!

I wasn't really informed that I had won anything at all, so I quite a surprised when I got this in the mail. Yay, gifts for me!

Ærlig talt, så har jeg aldrig prøvet et Vichy-produkt før, men jeg har kendt til deres mærke i nogen tid nu. Det virker som et simpelt mærke, og det kan jeg lide. Rent og enkelt!

Jeg blev ikke rigtig informeret om at jeg havde vundet noget som helst, så jeg blev rimelig overrasket da jeg modtog den i posten. Yay, gaver til mig!

(It was not ruined in the post. I had already ripped it open when the picture was taken. Pakken var ikke i stykker i posten, jeg har selv revet pakken itu før jeg tog billedet.)


Inside/indhold: 
1 x Liftactiv Serum 10 Eyes & Lashes sample and a little brochure

Inside the brochure are two more samples of two different products! 

Closeup so you can read.
English translation:
Vichy Liftactiv Serum 10 Eyes & Lashes
Suitable for: Women with obvious wrinkles and lack of tight skin around the eyes.
Effectivity: Transforms and opens the glance to the very outer eyelash-tip.
Has the powerful anti-age ingredients rhamnose and ceramides for an instant brightening effect.
Tolerance: With strenghtening and calming thermal spring water from Vichy. 
Tested under dermatological and ophthalmological control on sensitive eye-areas and on contact lens-users.
Without parabens or perfume. 
Enjoyment: ultra-light serum consistency. 
How to use: Morning and evening on cleansed skin and on your eyelashes.
Ideal primer before make-up.


Both pictures say the same, it's just the different sizes of their product. (I am not sure about the ml size though.)


I've tried their sample for almost 10 days now. I am quite happy with the results!
Jeg har prøvet deres tester i næsten 10 dage nu, og jeg er rigtig glad for resultaterne!

#1:Super smooth light texture that lasts throughout the day! When I felt my the skin around my during the day it would just as soft as if I had just applied the serum. 
Super glat og let tekstur som holder ved hele dagen! Når jeg mærkede huden omkring mit øje var det lige så blødt som havde jeg lige lagt min serum. 

#2: No parabens or perfume, that's always a plus. 
Ingen parabener og parfume, det er altid et plus.

#3: For sensitive eyes! I don't have sensitive eyes myself, but for me it's still a plus, as I love my eyes. 
For sensitive øjne! Jeg har ikke selv sarte øjne, men for mig er det stadig et plus fordi jeg elsker mine øjne. 

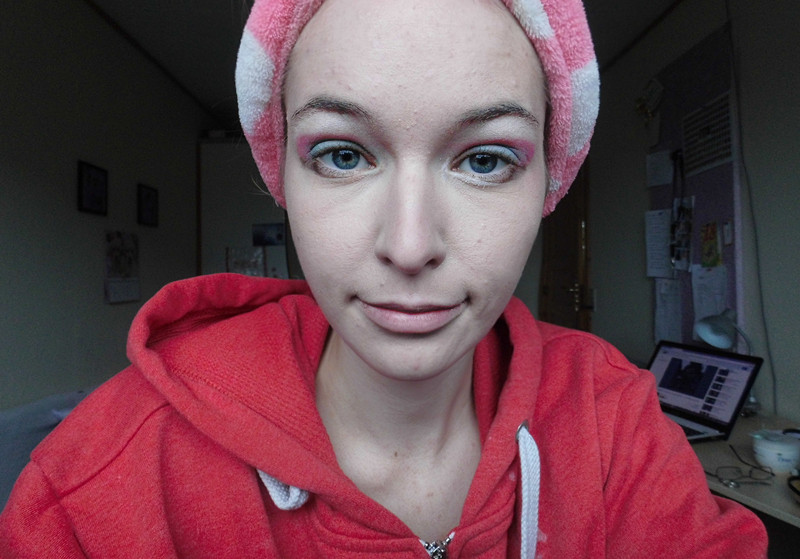
#4: Result! I don't have heavy wrinkles (or wrinkles at all) but I do have fine liners under my eyes and they were reduced after a couple of days using it only (usually products would take 3-4 weeks to work properly). Big clap to Vichy! 
Resultat! Jeg har ikke tydelige rynker (eller rynker overhovedet) men jeg har fine linjer under øjnene, og de blev reduceret efter kun et par dage (normalt tager et produkt 3-4 uger om at virke 100%). Stort klap til Vichy og mange tak for produktet! 

Would I purchase (and perhaps repurchase) this product then? 
I would indeed!
5/5 stars!

Ville jeg købe Vichy's Liftactiv Serum 10 Eyes & Lashes? 
Helt sikkert! 
5/5 stjerner!


That's all for this review. See you next time! 


***This is NOT a sponsored post, but my own opinion***


2/2 Tutorial ~ Dolly Ulzzang Look

Hello again! 

This is my second ulzzang-tutorial. You can see the first tutorial "naturel ulzzang" here.

This time I am going for a more childish and cute look! The look would be awesome and fully complete with a pair of circle lenses, but my eyes cannot stand any kind of lenses. 

I recommend using circle lenses for this look if you have the possibility!
The most important things about this look is having very huge eyes, and facial features that resembles a doll. Very pale porcelain skin and a petite nose and mouth is important as well, and big hair, or maybe a wig if you dare! Wear some cute pastel clothes, and you're good to go. 


I have already explained what "ulzzang" means in my former post, so no need to do the explanation again. Saves both time and space! 

Here is just a quick example of a naturel/mature ulzzang (left)and a dolly ulzzang (right) 


This tutorial will be less detailed, because it's quite simple. 
As usual we start from being bare-faced! 

Yay! What a sight! (Warning: Ugly view!) 


Apply BBcream all over, and dot concealer whereever needed. Apply powder in the T-zone area (forehead, nose, chin)

Eyes: 


Apply a pastel-pink on your eyelid and extend the line a little. Apply black shadow underneath your eye, drag it downwards for the puppy-eye effect. Apply a bright glitter-white eyeshadow in innercorner and under the lashline, and finish off making your aegyo-sal with brown.


Drag your liquid eyeliner down following the black eyeshadow. Put on mascara on your lashes. Cut a pair 1/3 naturel lashes and glue them to the extended line. This will make your eyes look a lot bigger!


Face: 


Apply pastel pink blush on the apples of your cheek (pink dots) and contour your chin and nose small as the red lines show on the picture. You do not need to highlight, but that's all up to oneself. 


Lips: Lips are the same gradiant as used for the first tutorial, but with a more pink colour. 

All done!
Also don't forget that it's more than okay to photoshop your pictures. Dolly ulzzangs are known to photoshop their pictures unhumanly, but adorable. So don't be jealous of their enormeos eyes or non-existing noses... It could be photoshop, it could be makeup! Final result:


Bye for now! 
(If you are interested in any of the used products comment below)


mandag den 23. september 2013

1-in-2 Tutorials: Naturel & Dolly Ulzzang Looks

Hello all ~

Having a nice day yet? This time I will post 2 tutorials, so please enjoy!
Picture borrowed from Tumblr. I thought it was nice and calming ♥ 

First off, the two tutorials will consist of two looks: The naturel ulzzang look and the dolly ulzzang look. 

Now what is ulzzang? Let's ask someone smarter than us: Google

Eoljjang (Korean: 얼짱), also spelled as Ulzzang or Uljjang, is a popular South Korean term literally meaning "best face" or "good-looking". Originally used as a slang term, this word in the English lexicon has evolved into describing a person that follows specific style of fashion.

So what makes an ulzzang "ulzzang"? The face features of course! The main feautures of an ulzzang girl (or boy) are: 

- Big eyes, and they would often wear heavy eyeliner, in some cases fake lashes, and circle lenses (Coloured lenses that increases the size of your naturel eye)

-  A small straight nose 

- White/pale and clear skin that's dewy (and not matte). 

- A slim figure (althought this isn't your face, it's an important part of the beauty and fashion amongst them, at least from what I see.)

- V-line face. Having a "V-line" means that your face is very slim. Here is an example below. The right has almost no V-line, while the left has a very obvious V-line. The chin is very small, pointy and sharp - hence it shapes like a "V"


- Aegyo sal. Aegyo sal are also called "lying silkworms". They're very popular in SKorea. Basically it's the line that shows up under your eye when you smile. It's not like a dark circle under the eye, but honestly... It's a little bunch of fat, that' just looks cute under your eye. Here are two examples. Right has no aegyo sal, and left has. 

 ¨

- Small nicely shaped lips. Ulzzang rarely have big full lips, but prefer doll-like small lips, and have a few trends for lips such as gradiant lips. Wearing gloss and lipstick with a sheer colour is also prefered more than dark and very obvious colours. 

- Very naturel and beautiful hair of course. Usually not any fancy colours, but usually long hair for the girls at least. It can be curly, and straight, but it's never really too fancy. It just looks healthy and nice!

- Straight and full eyebrows. Arched eyebrows are beautiful, but they make your face look more mature. Children have straight eyebrows. If an adult has straight eyebrows too, their face will all automicly look more youthful and naturel. Straight eyebrows can be very beautiful! 

Now that we know the main things about it, let's get to the tutorials. The first tutorial is the more naturel ulzzang. Just like the famous korean popstars. They're all very beautiful, but you can barely tell they are wearing makeup! They don't use circle lenses regulary. They look very naturel, sexy and they look more grown up than the dolly ulzzang. (Look inspired by the girls from SNSD)

Start off with a cleansed bare face:

Here is before: 

And here is after:

Let's start!
Start off with applying a BBcream all over your face. Don't use power unless really necessary. You want your face to look dewy and fresh. Use concealer only if needed! 

Eyemakeup: 


Apply nude eyshadow all over your eye. Apply a not too shimmery shadow on your browbone, and a caramel-colour on your eyelid, and a darker colours on your outer crease. Let the colours be matte and naturel.

Tightline your eyes. Use a gel liner (or pencil) and line the space between your lashes to make your lashes look fuller without actually lining your eyes with eyeliner. Don't use liquid liner for this look.


Make a slight wing at the end of your eye. You don't want the cat-effect comepletely, but drag the liner upwards. I use a felt-tip eyeliner for this to make it soft and subtle and not too harsh.


Make straight "korean" eyebrows. If you are like me and have very arched eyebrows, you do not need to pluck them. Get an eyeliner brush and a naturel eyeshadow or brow-pencil and fill in your brows. Now, you have to fill the spaces outside your brows, forming the straight lines as seen on the picture. Then apply a shimmery faded white on underneath your lower lashline, and apply some mascara on your upper lashes. 


Last but not least, if you don't already have aegyo-sal, you have to fake it! Do it by smiling, and find where you have to make your aegyo-sal. Then use a matte brown eyeshadow or bronzer and dap it on lightly.  Now the eye-makeup is done:


Facemakeup/Contouring:


The red lines show how and where you should contour. For a small chin and slim face, apply bronzer/eyeshadow along your  cheek and lower jaw. Apply contouring powder along the temples and close to your hairline to get a smaller overall face, and a smaller forhead. Contour down your nose for a slim nose as well! Remember: Contouring is unpermanent plastic surgery! 


The white lines are highlighter, and the orange line is blish. Highlight your face for a fresh glowing look. Apply your highlighter underneath the eyes, on the nose-bridge, chin and forhead. Basically all the places where the light strikes your face first and gives it glow. Now apply an orange blush along your cheek-bones, for glowy cheeks! 


Lips: 


Make a very subte, simple gradiant lip. Moisterize your lips, and pat on bbcream on the edges. Use a liptint or lipstick in a red colour and dap it closest to your teeth. With your finger, blend the colour out untill it fades. 

Now the look is all done! Put your hair simply. Let it stay down straight, curly, or put it in a ponytail. There are many different hairstyles and you can find lots of tutorials on youtube, or Google yourself some ideas! 

Here's the result! 


Whoa, this post was long! I will make the dolly ulzzang tutorial in my next post, otherwise this post will never end! See you next time! ♥ 


fredag den 20. september 2013

With vs. without mascara! ~ Elisabeth Arden Mascara

Hi! 

This is not a review, but more of a post of my thoughts! 
Mascara is said to be the most famous and most used product among girls when it comes to makeup. Almost every girl (if not every!) owns a mascara, the mascara is her starting kit, and most likely her ending kit (most old ladies also stick to their mascaras only), and it's an instant eye-brightener! 

So many girls worldwide love this single product, containing nothing but black "paint" to lenghten their lashes. I'm putting it to a test! Is it all that amazing and good? I haven't used mascara "only" for quite some time. When I use mascara I use it to clump them together with some fake lashes, but never ever alone. I swear to my eyeliner, and I only own one mascara (I would own none if I didn't get this one for my birthday), which is Elisabeth Arden mascara. I like E.A.'s products usually, so I'll see what her mascara can do for me. 

I'm not pro at mascara, and it's my LEAST favorite product. So why not challenge myself and show you and myself the actual difference? 

These are my eyes (with blurred out skin. My skin is awful without makeup), as they are naturelly. They are quite naturelly long and dark hence I never really thought I needed mascara, and they are also very curled too. 


Now let's put on a few coats of mascara! Here I am wearing 2-3 layers on my upper lashes and none on my bottom yet. I also curled my lashes before putting on the mascara. As you can see my noob-ness causes me to not know how to get onto my roots when I close my eyes. My practise will help that off eventually. I have a habit of clumping them together and whatnot, and I'm really no good with a mascara in my hand. Already missing the eyeliner! 


Warning: derp eyes
I looked into the camera lens, hence I look cockeyed. I promise you, I am not! 
Here is the result:
Left eye: Mascara on upper lashes + curled with eyelash curler
Right eye: Naked


From the side: I expected them to be longer. Like dramaticly long-longer! I'm satisfied with the curl thought. And the colour is not black 'enough', it's just not the same without my eyeliner. :'(


And here's the look seen from far away. It's not very obvious, but it's there! 


I find the "naturel" look too boring, so I added a bright orange lipstick to brighten up to boring face. Thought it's still too boring for me, it's better than nothing. Alright mascara, just like the first time, you failed me expections! Booh! You're not my favorite product! *gives eyeliner a hug*


But yes, that's it! Do you have any thought on mascara? Is it your favorite product, and what mascara do you use? Give me your thoughts! 

tirsdag den 17. september 2013

Mini-Makeup Tutorial; Fairy makeup

Hello! This will be my first official post on here! 

This is a mini-mini and super easy tutorial inspired by beautiful fairies. I love fairytales, and pastel-colours and fairies goes into one! The tutorial is made really simple, and nothing about it is too detailed, so everyone can follow up. I plan to make more tough and detailed tutorials in the future. 
However, what little girl haven't wanted to be a fairy? Become a fairy with a little makeup, and pow! Maybe there come some special powers too? Hu-hu! ~

Here is me, without makeup. I look kinda like a boy, maybe a bit of a zombie. I look like a lazy bum with my hubby's shirt and a fluffy hairband. Either way, not very "fairy". Let's do something about that! 


Now how do an ordinary girl become a fairy like so? 
Oh yeah, faires do sit on their blue chairs, with a pc in the background! Screw nature, right?! Kidding, kidding. I made this tutorial inside, and it rained all day. I planned to take some photos in the nature, but all the rain would most likely have ruined my makeup (and not to mention my camera!).

Here starts the tutorial. I will list all used products at the end. 
Always start with a bare face. Use a BBcream for flawless skin. It makes a huge difference, see? 

Before:


One layer of BBcream:

Faries are flawless creatures, so use a concealer to cover up anything your BBcream didn't. For me it's a few pimples, dark circles, and redness around mouth and nose. 

Set everything in with a powder, or a bbpowder. I recommend using a high quality brush for powder. I'm using Too Faced Teddy Bear Brush, and it works wonders! (While looking cute as well!)

All done with the base. Now you have a clean "canvas" to start working with. 


I made the eyeshadow ultra simple. You don't need very many shadows, however you need pastel eyeshadows in cute colourful... colours. 
1. Start by applying a white shimmery eyeshadow all over your eye area. 
2. Use a blending brush and a peach-pink colour at the outer corner and apply almost in a V-shape. Blend the edges. 
3. With an pastel blue (or electric blue for more pop) apply with your fingers onto your lid. Blend it into the pink. 
4. Apply a brown shade underneath the lashline, from outercorner to middle of the eye. 
6. Apply shimmery white shadow in your inner corners

Sorry that I look high on the picture. My eyelid folded a weird way, since I have uneven eyelids and make me look drunk hahah ~ Either way, that's how your eyeshadow should end up looking.


Now for counturing! Counturing is like a free temporary plastic surgery. It's amazing! Use a matt (NOT shimmery or light reflecting) brown eyeshadow/bronzer/whatever and contour the sides of your nose, cheeks and chin. Apply the same shade onto your eyebrows (unless your hair is another colour of course!) 

Also, apply a pastelpink blush on the apples of your cheeks. 

Time to line your eyes. Use a liquid liner and extend your liner downwards for a puppy-eye effect. It will work as a guideline for your false eyelashes. 


Choose a naturel pair of eyelashes and glue them as close to your naturel lashline as possible. Wait about 30 seconds for the glue to dry before sticking them onto your eye. 


Last, but not to forget, apply a babypink lipstick. I go a little over my naturel upperlip, since my upperlip is a lot smaller compares to my bottom lip. Make sure to conceal any blemishes around your mouth first, and apply lipcalm! 


Add your wig, put on a cute pasteldress, add sparkles and you're all done! 


Products used: 

- SKIN79 BB cream in light
- Rimmel Wake Me Up Concealer in ivory
- L'oreal BBpowder 
- 88 original eyeshadow pallette (pink, blue)
- Rimmel eyeshadow #100 Glam Ice (white)
- Nilens Jord eyeshadow #626 (brown, contouring)
- COOLCOS Blush #05 
- Rimmel Glam'Eyes #001 Black Glamour 
- Lashes are off-brand, bought on Ebay
- (offbrand) EYE waterproof eyelash glue in clear-white
- Dior lipstick #517 Diva (used EOS sweet mint underneath)

That's all for this entry! ~